> ## Documentation Index
> Fetch the complete documentation index at: https://docs.flashquotes.com/llms.txt
> Use this file to discover all available pages before exploring further.
# Contracts
> Add digital contracts to your booking flow with electronic signatures
export const PlusBadge = () =>
Plus
;
## Overview
Habe a contract signed before customers pay. Contracts are fully digital with electronic signatures, making the process fast for customers and secure for you.
Contracts require a [Plus or Pro plan](/settings/plans). Plus subscribers can create up to 2 contract templates. Pro subscribers get unlimited templates.
Build professional contracts with the rich text editor
Personalize contracts with dynamic customer data
See what customers experience when signing
## How Contracts Work
Customers sign contracts during the booking flow, after filling out details but before payment. Once all signatures are complete, they proceed to payment or booking if no payment is required to book. The signed contract is saved and available for both you and your customer.
## Creating a Contract Template
1. Go to **Templates** in the sidebar, then open the **Contracts** tab
2. Click **New Contract**
3. Give your contract a name
4. Use the rich text editor to write your contract
5. Add signature blocks where customers should sign
6. Save your template
[Learn more about the contract editor →](/templates/contracts/editor)
## Assigning a Contract to a Quote
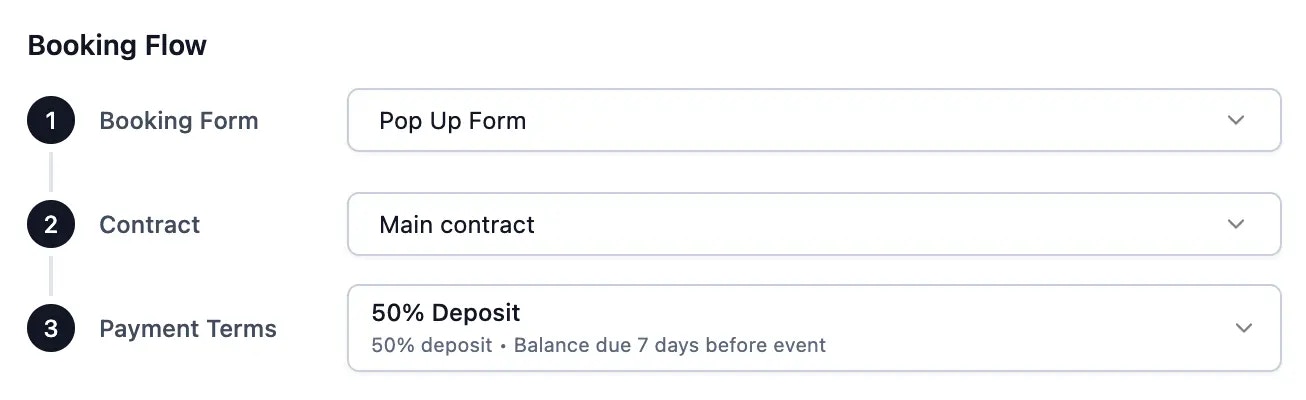
Add contracts to quotes in the Booking Flow section of the quote editor. Select a contract from the dropdown or create a new one.
1. Open a quote
2. Scroll to **Booking Flow**
3. Click the Contract dropdown
4. Select a contract template
 ## Setting a Default Contract
Set a default contract to automatically assign it to new quotes.
1. Open any quote
2. Go to **Booking Flow**
3. Click the Contract dropdown
4. Click **Edit** next to a contract
5. Toggle **Set as default**
## The Signing Experience
Customers review and sign contracts after filling out event details but before payment and booking. Here's what they see:
1. Contract displays in full with all personalized details
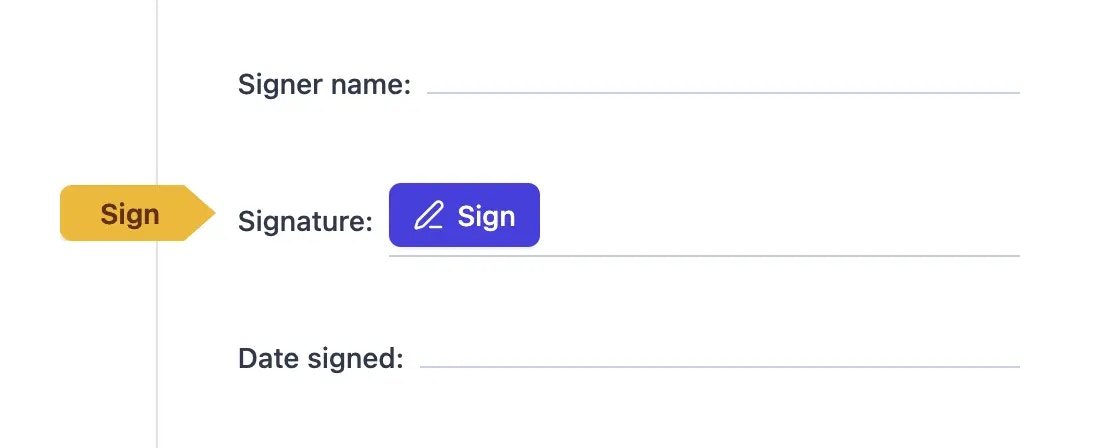
2. Signature blocks show where they need to sign
3. They click a signature block to begin signing
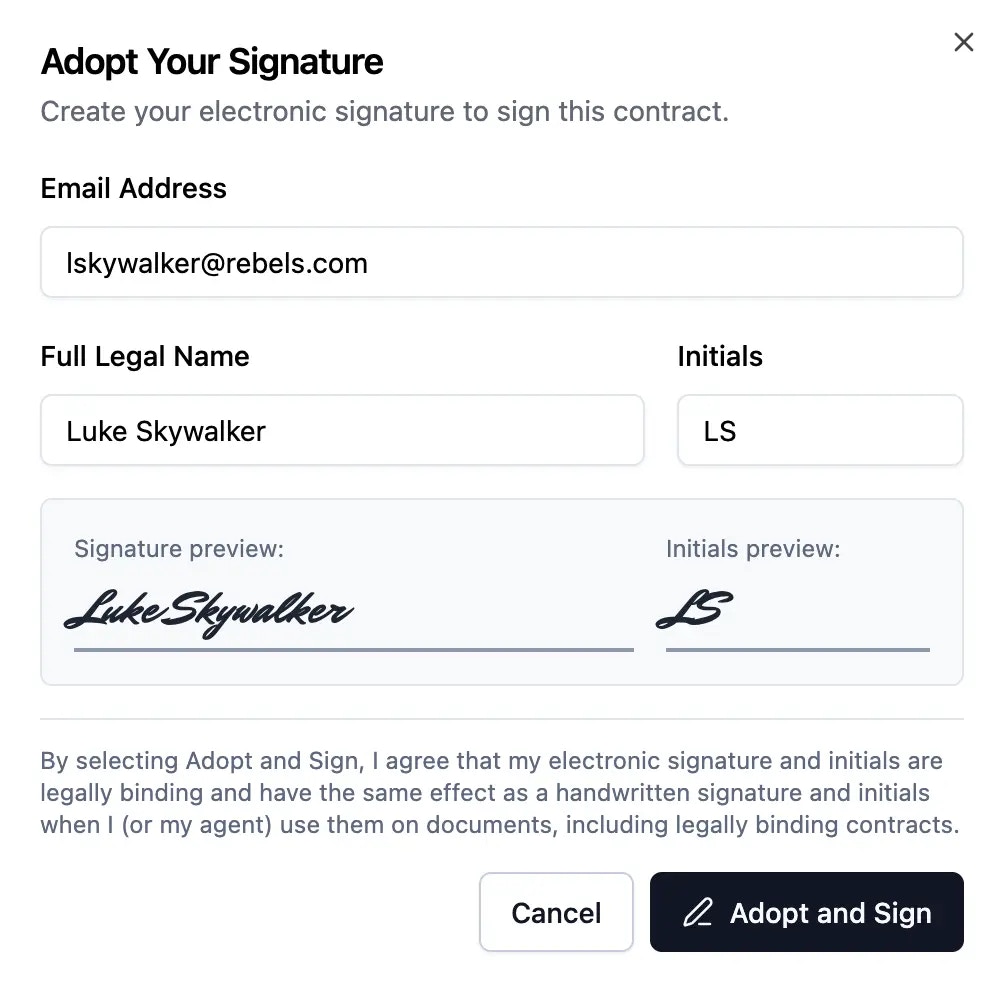
4. They enter their name, initials, and email
5. They acknowledge electronic signatures are legally binding
6. Once all signatures complete, a **Finish** button appears
7. They click Finish to fully execute the contract and proceed to the next step
## Setting a Default Contract
Set a default contract to automatically assign it to new quotes.
1. Open any quote
2. Go to **Booking Flow**
3. Click the Contract dropdown
4. Click **Edit** next to a contract
5. Toggle **Set as default**
## The Signing Experience
Customers review and sign contracts after filling out event details but before payment and booking. Here's what they see:
1. Contract displays in full with all personalized details
2. Signature blocks show where they need to sign
3. They click a signature block to begin signing
4. They enter their name, initials, and email
5. They acknowledge electronic signatures are legally binding
6. Once all signatures complete, a **Finish** button appears
7. They click Finish to fully execute the contract and proceed to the next step
 ## After Signing
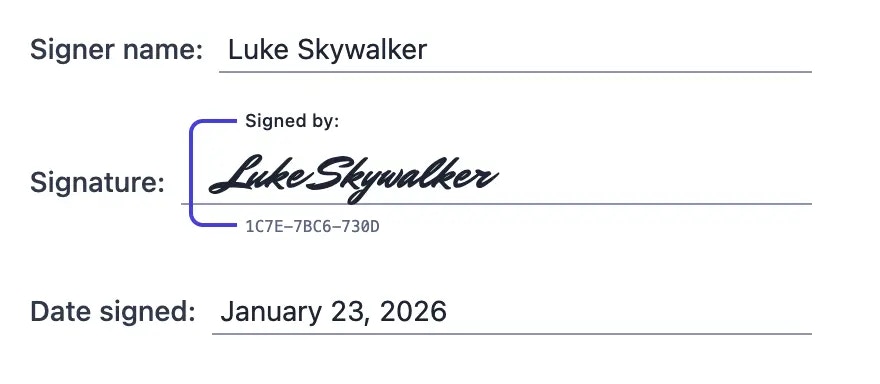
The signed contract is saved with signature data and timestamp. Both you and your customer can download or print it anytime from the booking details page.
## After Signing
The signed contract is saved with signature data and timestamp. Both you and your customer can download or print it anytime from the booking details page.
 ## Next Steps
Build contracts with formatting and signature blocks
Insert dynamic customer and quote data
Configure the booking experience
## Next Steps
Build contracts with formatting and signature blocks
Insert dynamic customer and quote data
Configure the booking experience