
Overview
Every invoice in Flashquotes belongs to a booking. Use the Invoices page to manage existing invoices, payments, and refunds. Create additional invoices from a booking or event’s Billing tab.Create an Invoice Without Requiring the Customer to Book a Quote
Manually create a booking to generate an invoice for your customer. They can pay the invoice directly without booking a quote themselves.- Go to Bookings and click New Booking.
- Enter the client, event details, services, and payment terms.
- Uncheck Send booking confirmation if you only want to send the invoice.
- Save the booking, then open its Billing tab.
- Open the invoice already created for that booking.
- Review the recipient, line items, discounts, tax rate, balance due, and due date.
- Choose Share invoice link and send the link to your customer.
Dashboard Overview
Key Metrics
Key Metrics
The invoice dashboard displays:
- Total unpaid invoices
- Overdue invoices count
- Total payments received (last 30 days)
- Payment status summaries
Invoice Filtering
Invoice Filtering
Filter and search your invoices from the dashboard:
- Status filters: Select one or more statuses — Open, Pending, Paid, Overdue, or Voided
- Due date range: Narrow results to a specific date window
- Full-text search: Search across invoice details to find what you need fast
- Sortable columns: Click any column header to sort ascending or descending
CSV Export
CSV Export
Export your invoices list to a spreadsheet for reporting or reconciliation:
- Apply any filters you want — only filtered results are exported
- Click Export CSV
- Choose which columns to include
- Download and open in Excel, Google Sheets, or any spreadsheet tool
Invoice Management
Creating and Editing Invoices
A booking can have multiple invoices. Each has its own recipient, due date, payments, and reminders.- Open an existing booking or event’s Billing tab.
- Select an invoice to edit, or click New invoice for an additional bill.
Invoice Customization
Invoice Customization
Customize invoices with:
- Entity information
- Email recipients
- Due dates
- Tax rates
- Purchase order numbers
- Customer notes
- Line item tax settings
- Custom pricing
- Discounts
Adding Services
Adding Services
Modify existing invoices by:
- Adding new services
- Adjusting quantities
- Updating pricing
- Including additional line items
Changes can be made even after the initial booking is confirmed.
Per-line-item Discounts
Per-line-item Discounts
Attach an existing discount to any single line item from the line-item editor’s Discount picker, or select + New discount to create one inline (it auto-applies). Use Manage discounts to jump to Settings → Discounts.
- Line-item discounts apply before any order-level discount and floor at $0.
- Gratuity is never discounted.
- Discounted amounts flow through totals, taxes, and QuickBooks sync — QuickBooks invoice lines receive the discounted amount so totals reconcile.
- Customers see the original price with a strikethrough next to the discounted “now” price and the discount name on the booking summary, quote view, payment page, and both PDFs.
Changing Bill-to Details
To bill a different person or company, open the invoice and edit the name and email under Invoice settings → Bill to details. Changes save when you click away and apply only to that invoice. The booking contact and other invoices stay as they are. Invoice emails, automated invoice reminders, and payment receipts use the invoice’s bill-to email. Changing the booking contact preserves saved invoice bill-to details; older invoices without them fall back to the booking’s billing name and current contact email.To move the whole booking to another contact, see Changing the booking contact.
Add a tip after the event
To collect a tip once the event is over, edit the existing invoice on the booking. Flashquotes doesn’t generate a standalone Stripe payment link for tipping, and customers can’t choose an arbitrary tip amount on their own after booking.- Open the invoice you want to add the tip to from the booking’s Billing tab.
- Edit the booking’s Tip amount field, or add a Gratuity line item to the invoice for the amount you want to collect.
- Save the invoice so the new total and remaining balance recalculate.
- Re-send that invoice’s link to the customer using Send invoice or Share invoice link.
- The customer pays the updated balance on the same invoice payment page.
The tip amount you enter is the amount the customer will pay. There is no self-service flow for a customer to pick a tip amount after the booking is complete — you set the amount on the invoice first.
Gratuity captured through the booking form is covered in Booking Flow. For how gratuity is surfaced to staff on the event brief, see Gratuity Visibility.
Invoice Reminders
Flashquotes offers tools to remind customers about their outstanding invoices:- Automatic email reminders on a predefined schedule
- Manual one-off reminder emails
- Customer payment links accessible from confirmation pages
For detailed information on setting up and using invoice reminders, see the
Invoice Reminders page.
Payment Processing
Payment Breakdown
The invoice view displays a detailed breakdown of all payments made toward the invoice:- Payment history: Each payment shows the date, method, and amount paid
- Card details: Stripe payments display the card brand and last 4 digits (e.g., Visa •••• 4242)
- Payment status: Clearly distinguishes between pending and completed payments
- Receipt links: Payments made through Stripe include a clickable receipt link — click the payment amount to view the Stripe receipt
- Refunds: Refunded amounts appear in the breakdown with negative values
Payment Options
Payment Methods
Payment Methods
Accept payments through:
- Stripe Link (one-click payments)
- Credit/debit cards
- Stripe Bank Transfer
- Manual payment recording
- Scheduled payments
Bank transfers do not settle immediately and show pending status while processing.
Manual Transactions
Manual Transactions
Record payments received through:
- Check
- Bank transfer
- Cash
- Other
Payment Schedule
Payment Schedule
You can add a partial invoice payment by clicking the 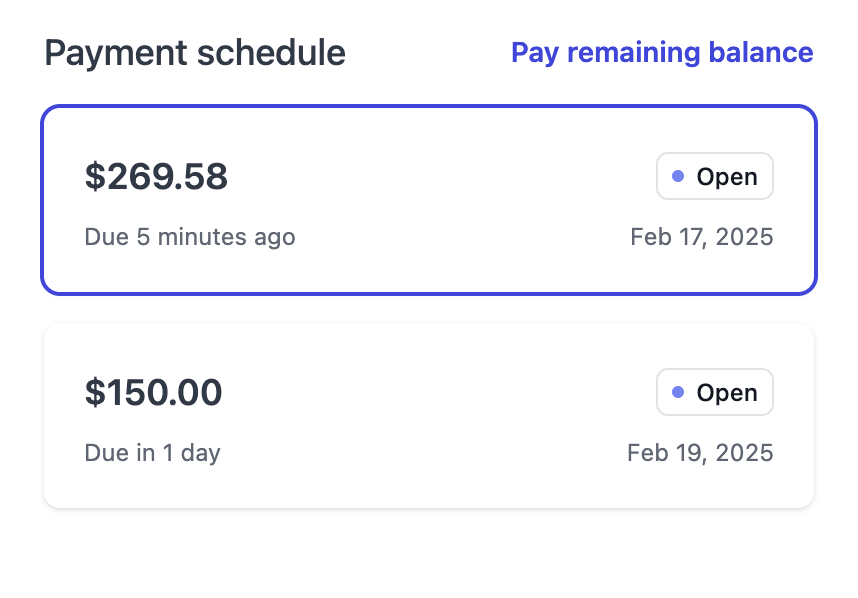
Add Installment button in the invoice Payment Schedule table. The table shows all existing payments alongside future expected payments, including the remaining balance, so you always have a complete picture of the payment timeline.Scheduled installments will then be available for customers to select and pay from the invoice payment page. If they’d rather, customers can opt to pay the remaining balance.For comprehensive payment terms configuration including deposits, invoice due dates, and more, see our Booking Flow guide.
Financial Reporting
Tax Reports
For detailed tax reporting and analysis:Go to Reports → Sales tax to see total sales, taxable amounts, and tax collected, broken down by tax rate. Learn more about the Sales Tax report →
Performance Analytics
Track financial performance and customer behavior with the Reports dashboard:- Average Gratuity Analysis - Understand tipping patterns and optimize gratuity settings
- Top Clients by Revenue - Identify your most valuable customers
- View comprehensive revenue trends and business analytics
Stripe Integration
Stripe Features
Stripe Features
- Process all transactions through Stripe
- Handle refunds within Flashquotes
- View payment history
- Access detailed transaction records
Invoice Sharing
Distribution Options
- Email directly through Flashquotes
- Share invoice links
- Generate PDF versions
- Send payment reminders
Best Practices
- Regularly review overdue invoices
- Set consistent payment terms
- Keep tax settings updated
- Monitor payment processing methods
- Maintain accurate customer information
Next Steps
After mastering invoices:- Configure forms
- Set up payment reminders
- Establish follow-up procedures
- Review financial reporting needs